Graphical User Interface
Introduction
FocusStack processes focus-bracketed images in two phases:
Project: Batch processing (alignment/balancing/stacking)
Retouch: Layer-based refinement
[!NOTE] Advanced processing details in main documentation.
The batch processing supports image alignment, color and luminosity balance, vignetting removal, noisy pixel masking.
Starting
The python package can be installed from PyPI using
pip:
> pip install shinestacker
Onace installed, the GUI app can start either from a console command line :
> shinestacker
The app can be dowloaded from the releases page:
Windows: as installer or
ziparchive for local installationmacOS: as
dmgdisk image, where the app can be dragged to the Application folderLinux: as
tar.gzarchive
The GUI has two main working areas:
Project
Retouch
Switching from Project to Retouch can be done from the ShineStacker main menu.
Project area
When the app starts, it proposes to create a new project.
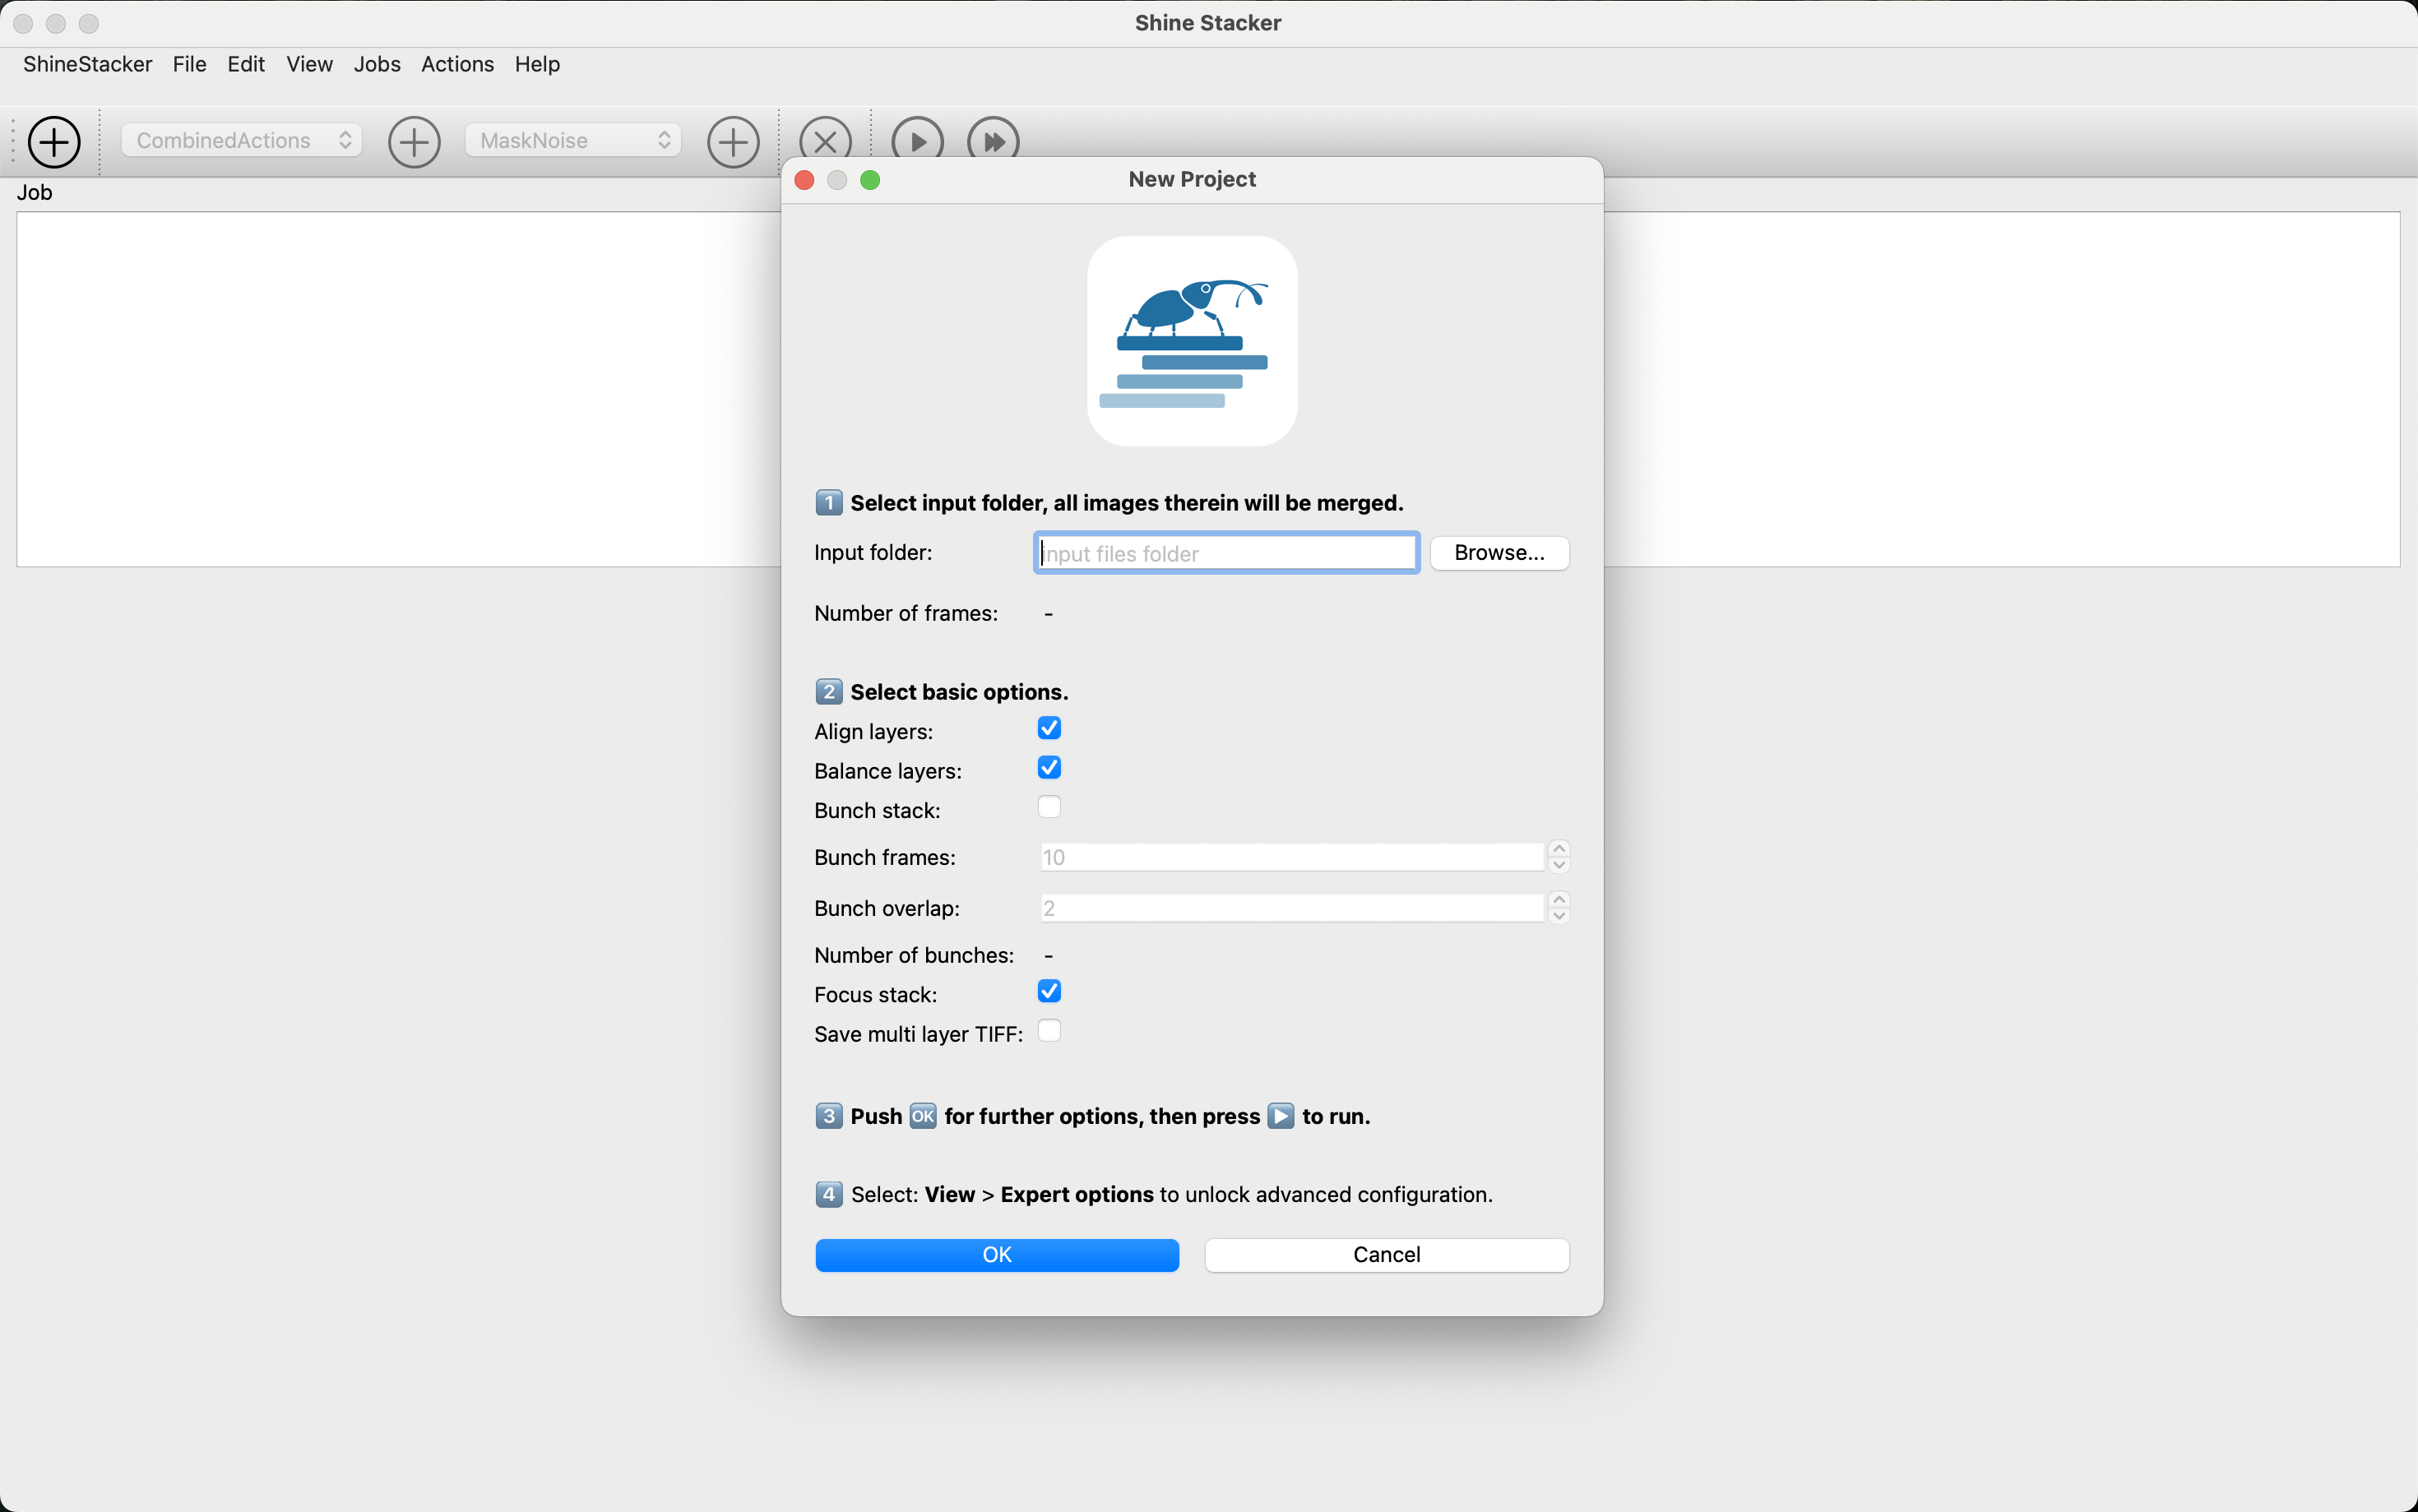
Creating Projects
Select source folder (JPEG/TIFF 8/16-bit)
Configure job actions (auto-saved in project file)
Run processing:
Real-time logs & progress bar
Thumbnail previews for each stage

Large Set Tip: For 100+ images:
Split into 10-15 image “bunches”
Set number of overlapping frame from consecutive bunches
Combine intermediate results later
The newly created project consists of a single job that contains more actions. Each action produces a folder as output that has, by default, the action’s name. Some actions can be combined in order to produce a single intermediate output (alignment, balancing, etc.).
Pro Tip: Duplicate jobs when processing similar image sets to save configuration time. You can run multiple jobs in sequence.
It is possible to run a single job, or all jobs within a project.
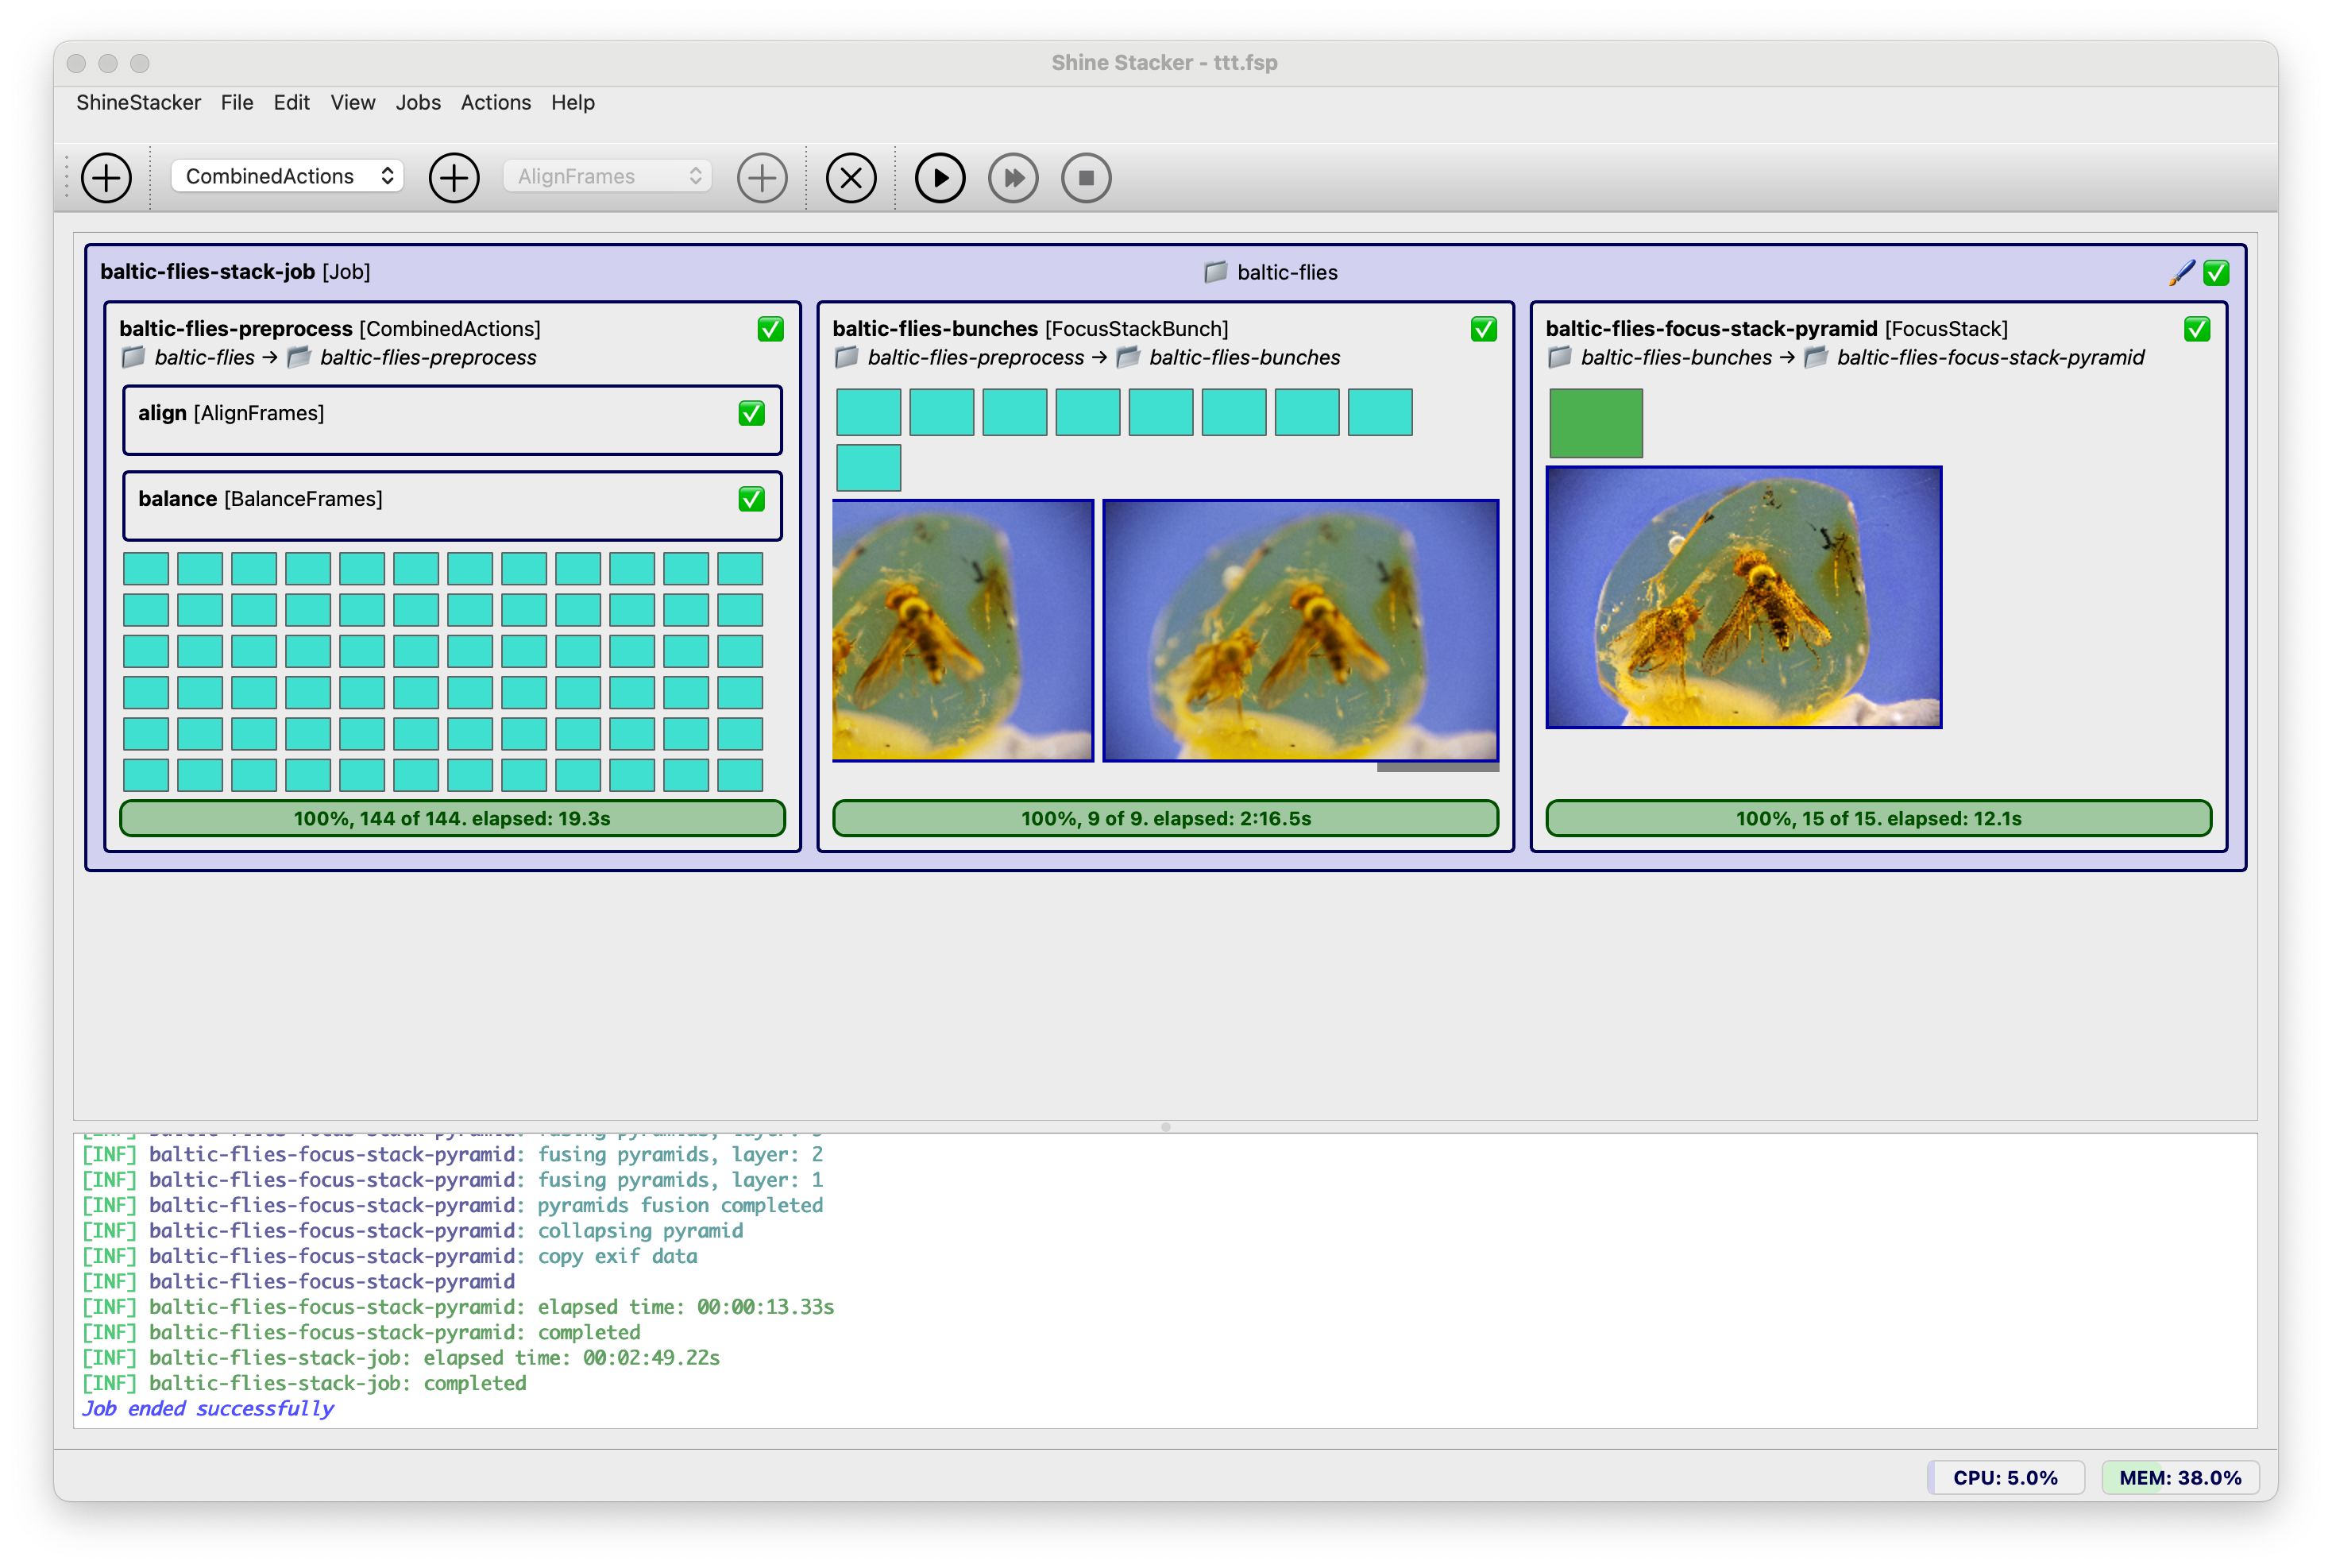
Project Run Tabs
Job progress bar with CPU and RAM usage monitor
Real-time log viewer
Retouch button (enabled after processing)
When the job finishes, a Retouch button is enabled, which opens the output image into the retouch area.
Retouch area
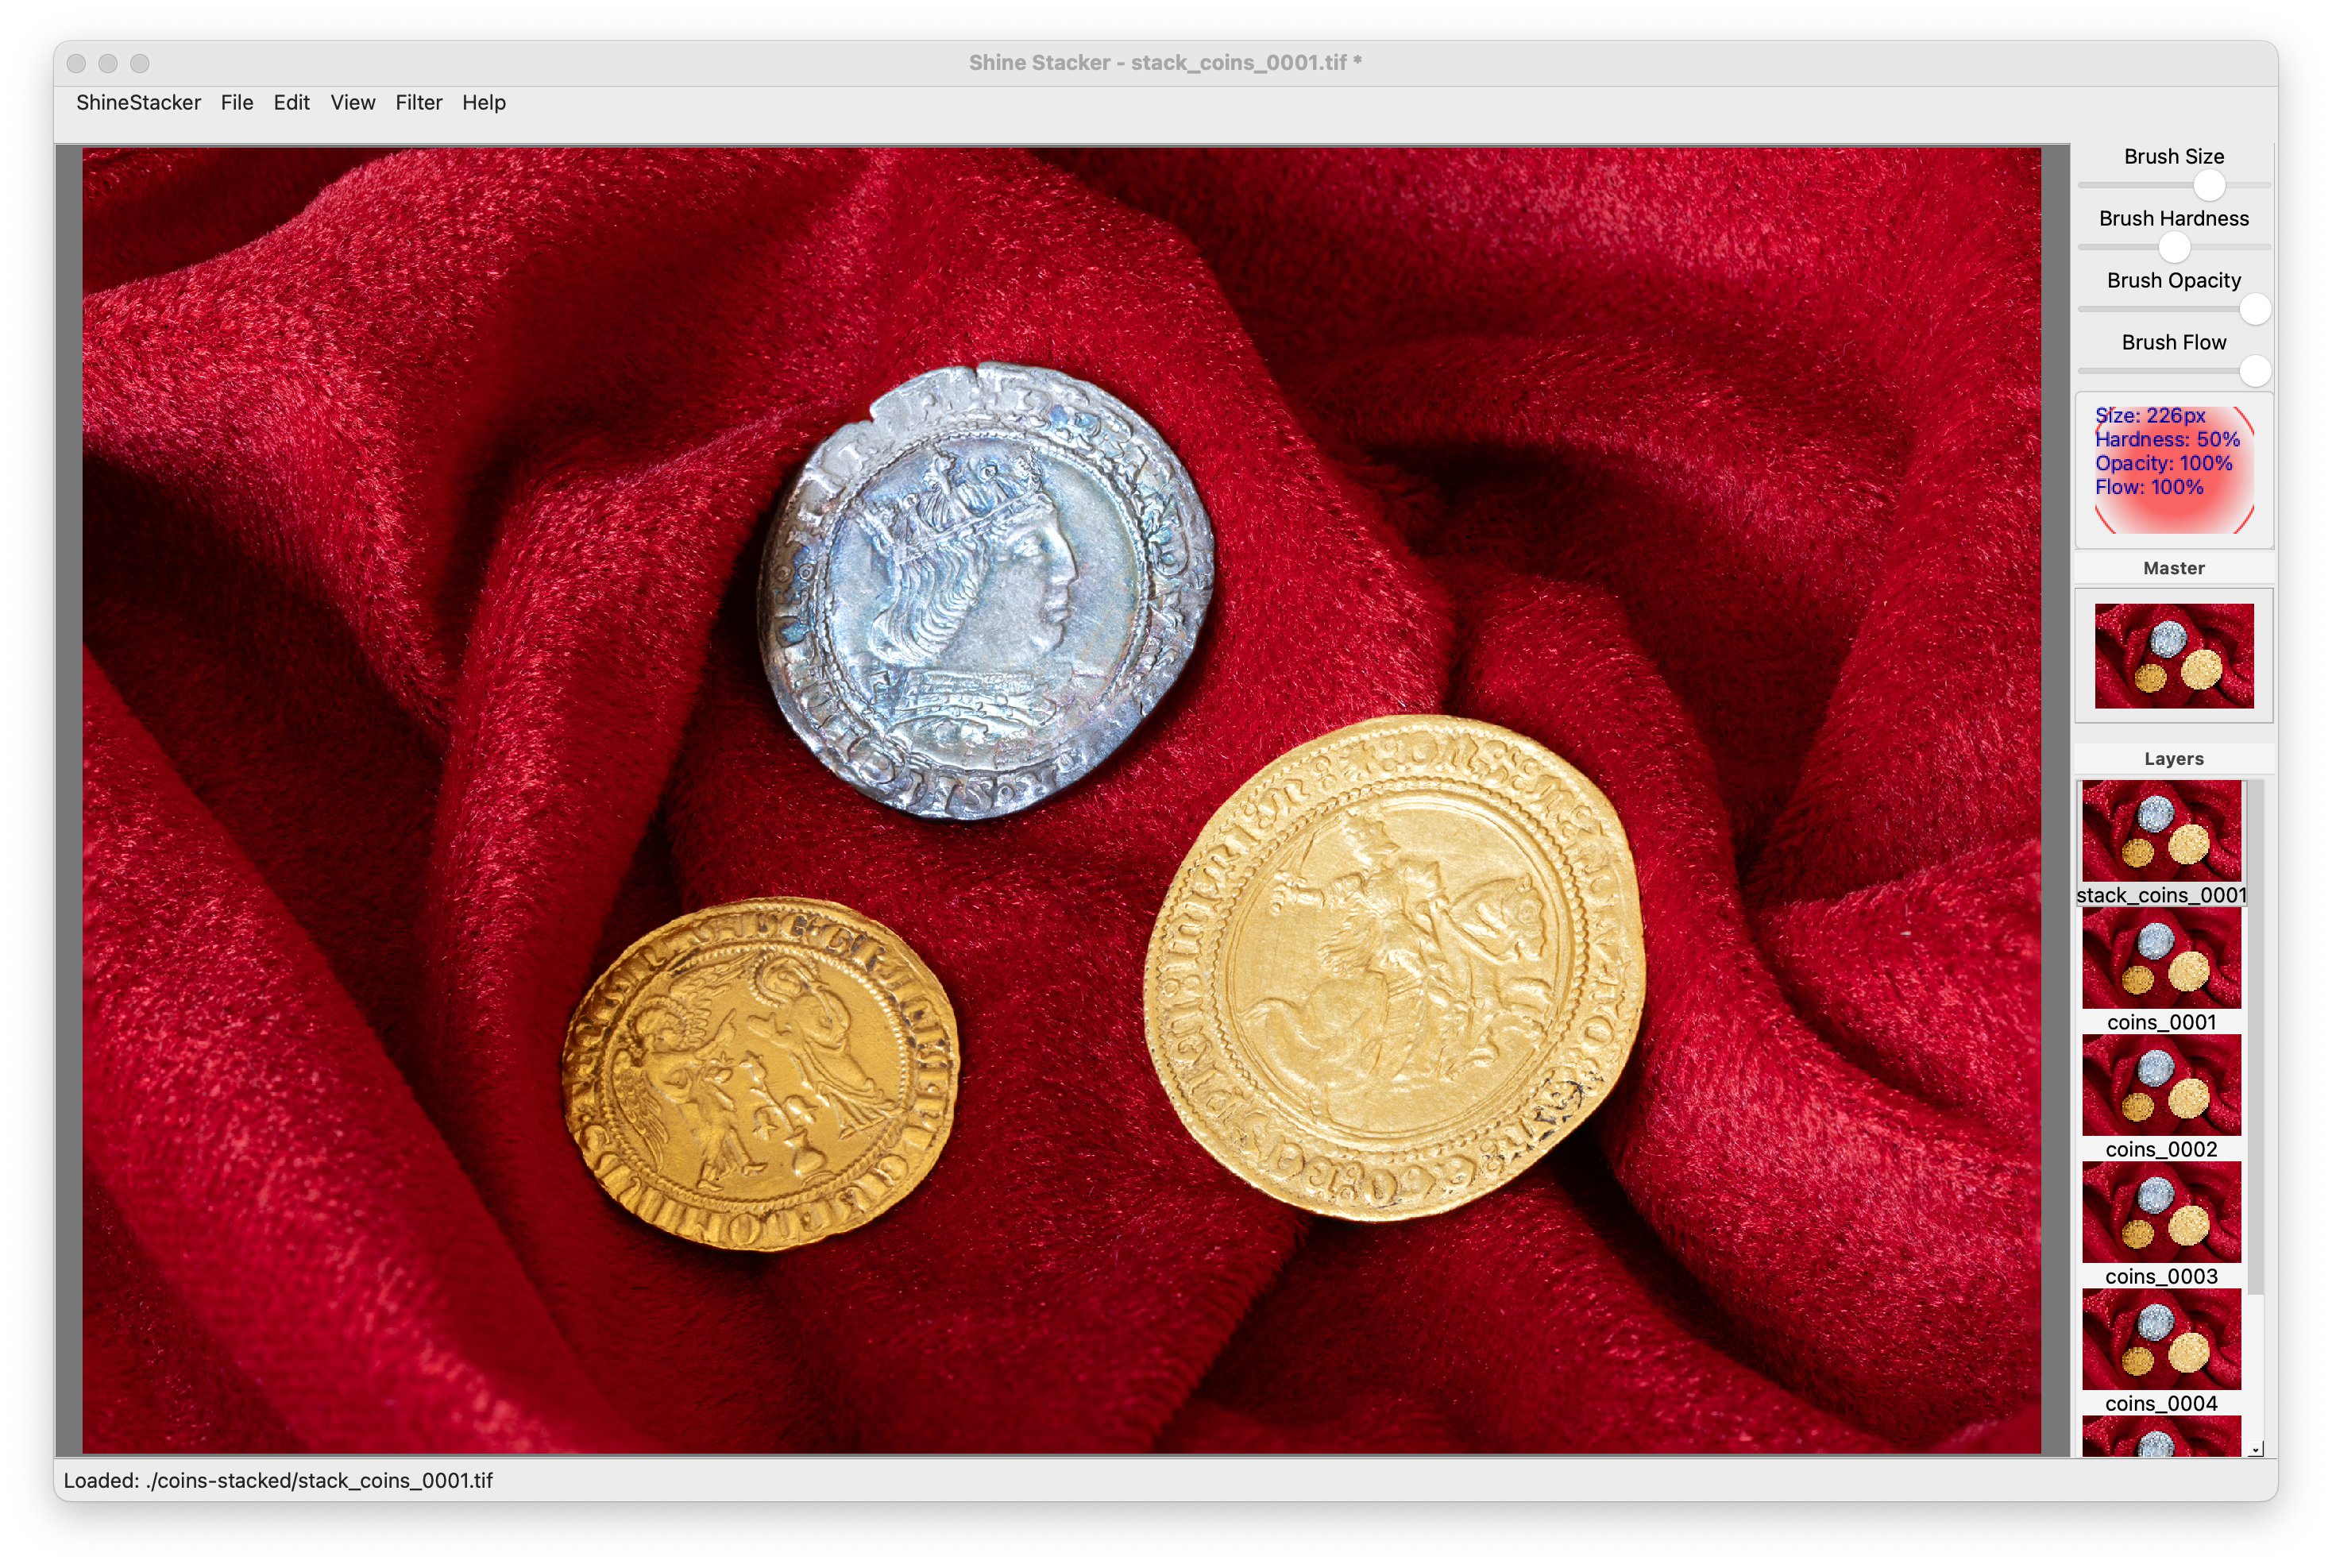
Brush Properties
Adjust in the top toolbar:
Size: Brush diameter (px)
Hardness: Edge softness (0-100%)
Opacity: Paint transparency
Flow: Paint accumulation rate
💡 Pro Tip: Use low opacity/flow (20-40%) for subtle corrections
Retouch Workflow
Navigate:
Zoom/pan to defect area
Toggle between master/source (
X)
Correct defects/artifacts:**:
Select source layer with clean area
Adjust brush properties (size/hardness/opacity)
Paint over defects
Use
Ctrl+Zto undo strokes
Verify:
Toggle master view (
M) to check resultsCompare before/after with
L/Mtoggle
Filters:
Improve the final image with sharpening, denoise and color balance
Export:
✅ Final image: Single TIFF/JPEG
🗂️ Editable: Multilayer TIFF (large)
Action |
Shortcut |
|---|---|
Zoom in/out |
|
Reset view |
|
Pan |
|
Prev./next layer |
|
View master layer |
|
View source layer |
|
Toggle master ↔ layer |
|
Temp. toggle master ↔ source |
|
See help menu for complete list of shortcuts.
Export Formats:
Single TIFF: Final image (highest quality)
Single JPEG: For web and quick preview (lower quality)
Multilayer TIFF: Preserves all layers (large file)
EXIF metadata:
EXIF data can be imported from source images and saved with final file.